Wednesday, April 30, 2014

Review: Revlon Photoready Perfecting Primer

"Face Primer is relatively new product. It is used as a protective barrier between your skincare and makeup, ensuring your makeup stays longer"

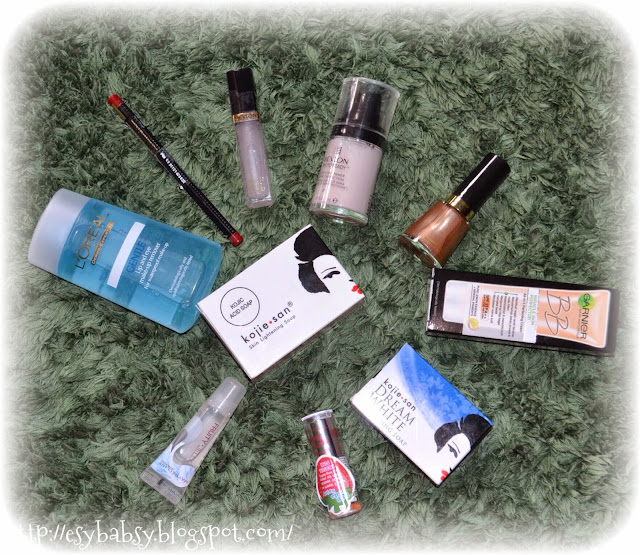
Finally I got the time to try out this product and make a review. This is actually part of my last April haul.

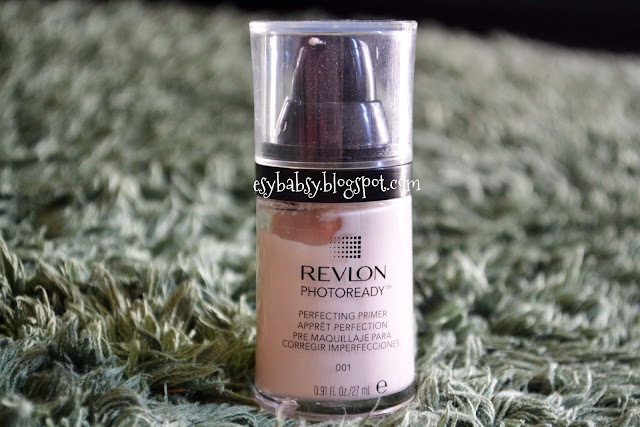
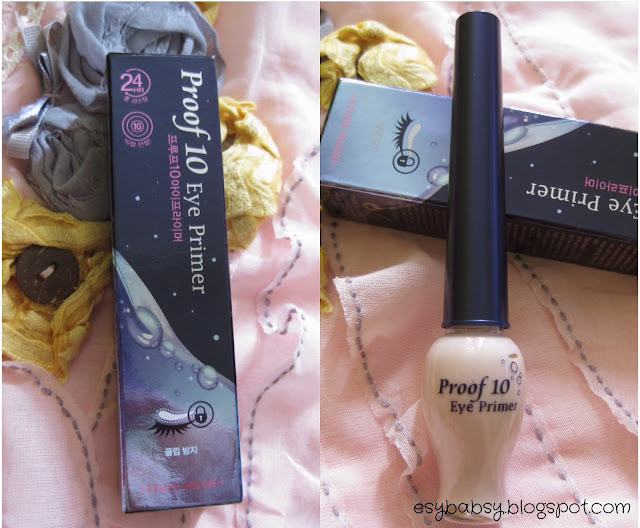
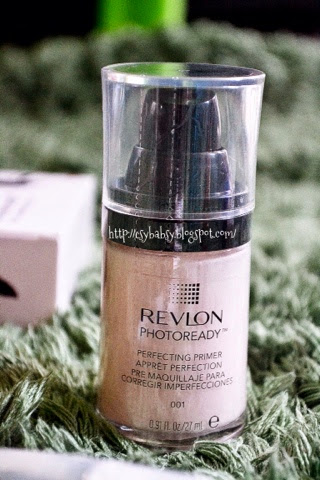
This primer comes in a clear glass pump bottle with a clear plastic cap.

If you look closely there's a code 001 written on the bottle but I'm not so sure what's that about. I think I remember the sales assistant mention something about it but I hardly remember. Neither their official website explain about it.


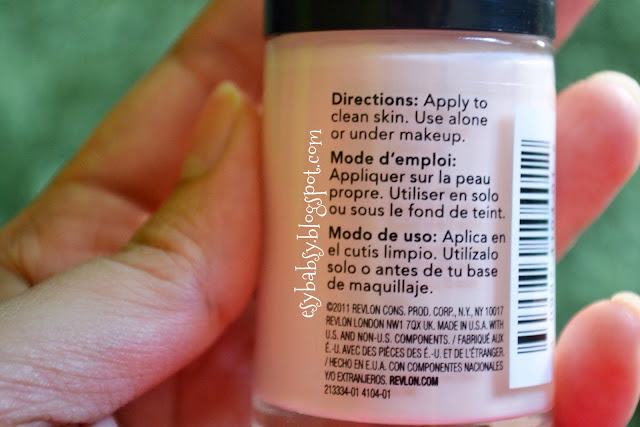
Directions of use. The sales assistant said this can be used as a moisturizer as well.

Ingredients:
Dimethicone, Isododecane, Water, Trisiloxane, PEG/PPG-19/19 Dimethicone, Isodecyl Neopentanoate, C13-16 Isoparaffin, Silica Silylate, C10-13 Isoparaffin, Dimethicone Crosspolymer, Dimethicone/Bis-Isobutyl PPG-20 Crosspolymer, Silica, Tocopherol, Glycerin, Methyl Methacrylate Crosspolymer, Methicone, Calcium Aluminum Borosilicate, Triethoxycaprylylsilane, Phenoxyethanol, Caprylyl Glycol, 1,2-Hexanediol. May Contain: Mica, Titanium Dioxide, Iron Oxides, Ultramarines.

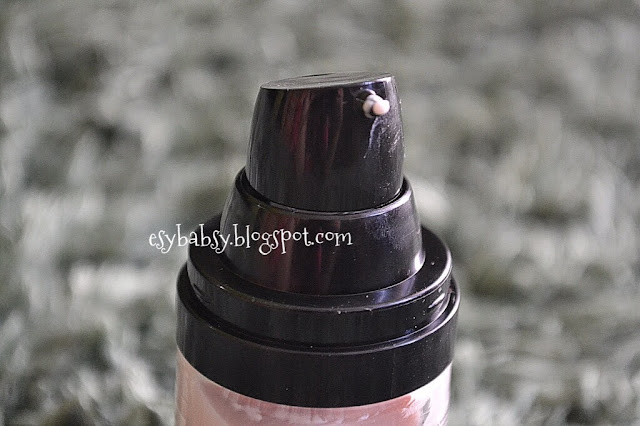
The pump. I adore pump bottle.

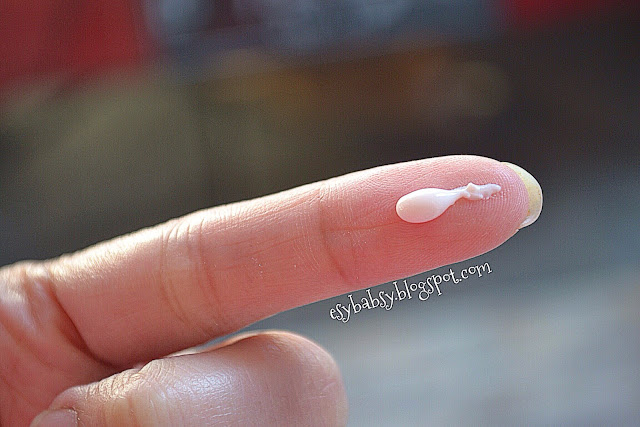
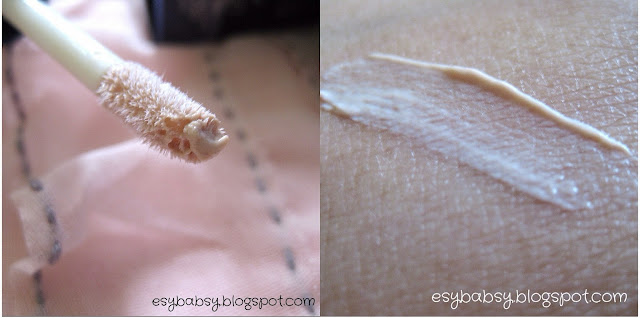
The cream is very light textured with skintone color. But when you apply this to your skin, it's transparent.

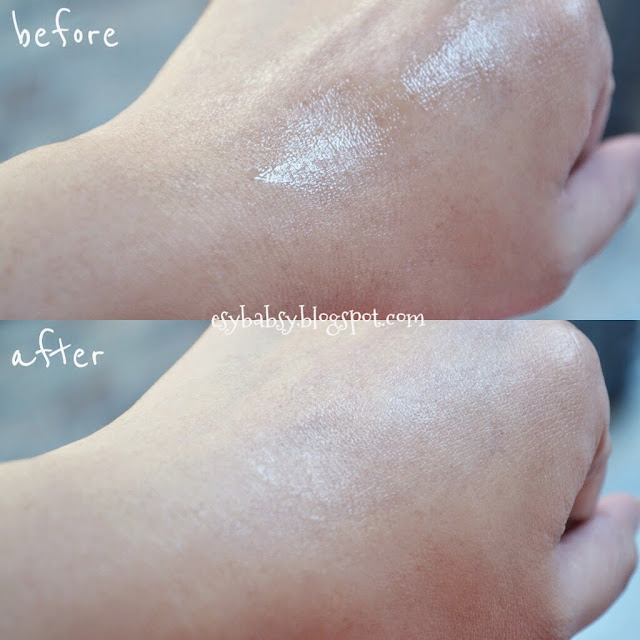
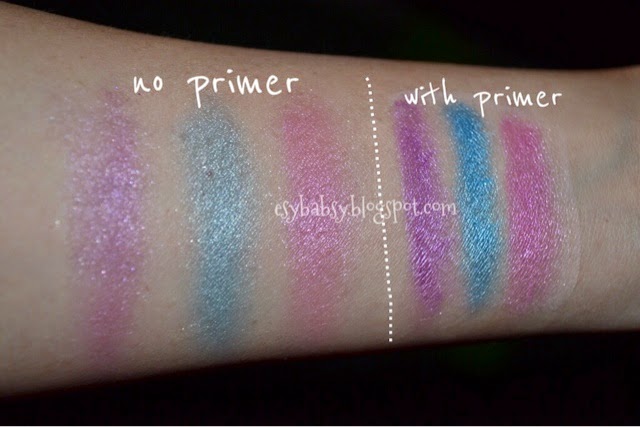
The picture above is an example on my hand. I apply moisturizer and top it with this primer, and the result on my skin was somewhat smooth and velvety (is velvety a word?). The same goes on my face. After applying face serum, sunscreen, moisturizer, and all those skincare routines, you can imagine how glossy your face look like ahahahha. Of course you have to wait for a while to let your skin absorb them, but I don't do that. And applying this primer after wearing your skincare has a great mattifying effect. My face felt instantly soft, smooth, and velvety (seriously, is that a word?).

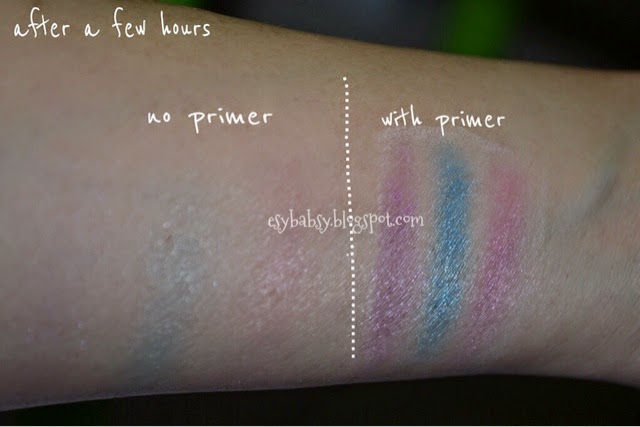
I tried to wear this before applying Tony Moly CC Cream, and CC cream usually has a bad effect on my normal-oily skin since my face will get oily in just an hour. But applying this at least lengthen the matte effect up to 3-4 hours. Really love this product. But maybe this won't do for those who have dry skin.

And, oh, for those who don't know how to apply this, just dab this to your whole face after applying moisturizer, and before applying foundation/BB cream/face powder.

Verdicts:
  • Odorless skintone cream.
  • Light textured cream, a little goes along the way.
  • Instant smooth result.
  • Matte effect.
  • Best result for normal to oily skin.
  • Not recommended for dry skin.
  • How much: IDR 155K (USD 16).

Thanks for reading. Hope this review is useful. ^_^


Monday, April 28, 2014

Tutorial: Nicki Minaj Eye Makeup

When it comes to Nicki Minaj, all I can think of her is: a super colorful lollipop! I don't listen to her songs, but I adore her colorful makeup and the attitude. LOL.

I want to try recreating one of her looks:


Let's see how I recreate this :)


  1. After priming your eyes and drawing your eyebrows, apply a dark brown eyeshadow on your crease and outter V.
  2. Fill your whole upper eyelids with bright green color.
  3. Line your lower lash bed with white pencil. Make it longer than your natural eye shape.
  4. Apply bright blue shade on top of the white line.
  5. Line your upper lids and water line with black eyeliner.
  6. Fake eyelashes is a must, because it's Minaj look! XD

It took a lot of effort for me to make this look, LOL, so I think a little picture spamming won't hurt you :)


    Credits:

    • NYX eye shadow base (matte white)
    • NYX single eyeshadow (dark brown)
    • Sleek iDivine Palette (bright green)
    • NYX retractable eyeliner (white)
    • LA Colors 16 colors eyeshadow palette (bright blue)
    • Maybelline Falsies Mascara (black)
    • Mizzu eyeliner pen (black)
    • Artistry automatic eyeliner (black)
    • Itsdiva eyelashes
    • X2 Bio softlenses for sensitive eyes (blue)
    • Silky Girl eyebrow pencil (brown)


    Saturday, April 26, 2014

    The Liebster Award: Part 3

    I got another Liebster Award. Yeay! To be honest it's my third one. I was nominated by Sylvie Putrie. Yu can check out her blog here. Thank you so much Sylvie :)


    Here are the rules when you receive this award:
    1. Thank the person who nominated you.
    2. Copy the Liebster Award logo in your blog.
    3. Answer the questions the tagger set for you.
    4. Mention 11 random things about you.
    5. Choose 5-11 bloggers to be nominated next and link them in your post, with the follower less than 200.
    6. Create 11 questions for the people you’ve tagged to answer.
    7. Show these rules in your blogs (or you can copy from here).
    8. Tell the people you have nominated! They'll never know unless you tell them.


    1. When did you start your blog?
    To be exact, I started blogging since 2012. It was cocofountain.wordpress.com, but there were only 3 or 4 posts I made. LOL. I just blogged about my daily life, it was like a personal diary. Then in late January 2014, I started this blog, mainly talk about beauty.

    2. What's the obstacle being a good blogger?
    Finding the right time to blog, since I'm alone with my 3 year-old kid, an active boy, no house keeper, well yeah, finding a good time to blog and the energy is the main obstacle for me.

    3. Nude lips or Bold lips?
    Nude lips works best on me. I feel like my skintone looks brighter when wearing nude lipstick.

    4. What is your secret beauty? Tell me why
    I use Bengkoang face mask and scrub every single day, and, no, my face doesn't get all dry because of this. Instead, it really looks brighter everyday :)

    5. What makeup product you would buy under Rp. 100.000,- ?
    Any kind. Except for a complete set of makeup palette, because it's gotta be fake. :)

    6. What is your best part of you being a blogger? (example, good at review product or good at makeup tutorial)
    I'm a newbie, I just learned to use makeup since four months ago, so making a tutorial is not really my thing. So, I think I'm pretty good at making product reviews, since I tried as detailed and honest as possible. And as for makeup tutorial, I usually go with simple look since my lack of ability. LOL.

    7. Describe you in 3 words !
    Laid back, quite, and introvert.

    8. Are you an animal lover? What is that?
    I used to be a cat lover, but since I got pregnant, I became an anti-cat. I used to have a kitten whom I love dearly, though, and died just like that because of food poisoning.

    9. What is your favourite makeup product?
    Tony Moly Luminous Goddess Aura BB Cream (do I mention it correctly?) and The Body Shop Tea Tree Pore Minimiser.

    10. What is your fashion signature style?
    Sporty, oftenly. And weird, sometimes.

    11. What is your aim to be a blogger?
    To spend my time since I have nothing more to do, it's to keep my brain sharp. Maybe in the future, I can do something about this blog but I haven't figured it out just yet.

    And as for 11 random facts about me and the ones I nominated as the next Liebster Award nominee, was posted in my previous article. You can check it out here.

    Once again, thank you so much Sylvie.

    See you


    Review: Etude House Proof 10 Eye Primer

    I usually write my article right to the point, no strings attached. But, I wanna do something different from now on. Here, I would like to review about eye primer. But before we continue, I would like to explain about this eye primer thing. Just, what is that?

    Eye primer (or many refer it as 'eye base') works like a foundation on your eyelids, the function is to make your eyeshadow colors stand out more and stay longer.

    The eye primer I would like to talk about is Proof 10 Eye Primer by Etude House. Many beuaty blogger compare this to the infamous Urban Decay Primer Potion. So I was curious. Besides, UD is way too expensive for me.

    A little info, eye makeup products coming from Proof 10 series by Etude House were claimed as the waterproof and smudgeproof ones, let alone their longevity. You can check out other products from this series on EH Indonesia official website.

    Like other products coming from Proof 10 series, this primer was placed in a dark blue glossy box. The bottle itslef look similar like the Tear Drop Liner: small and curvy, with a long dark blue cap which has a function as the applicator.


    The applicator looks like a lip gloss, coming out of the bottle was odorless and thick skintone cream.


    Here are some examples on my wrist:


    As you can see the part with eye primer is much more stand out. I have to apply several times to get the color intensity I wanted without eye primer and it was not easy. But using this product as a base really make my life easier.


    Here is the picture of my wrist after several hours. They both faded, but the part without primer was worse.

    The examples above are swatched on my wrist, the body part that touched things the most, it was my bare skin with merely eye primer, no powder, no foundation. So applying this to your eyelids would have better result, I assume.

    Another example when applied to my lower lids:


    As you can see on the picture above, I applied this on my lower lash bed to make my lower liner stay longer (I have very oily lids and teary eyes). It really, really, hold the liner in its place. But, to be honest, applying this is a bit tricky because the cream dried really fast, and once it dried, it will leave an unpleasant trace like the picture above (see where the arrow points). So, I would suggest to apply this evenly as fast as you can! But the good thing is this product doesn't break out in my wrinkles. LOL. It just covers your lids perfectly!

    So far, here are my verdicts:

    • Thick odorless cream
    • Skintone cream
    • Really make eyeshadow colors 'pop' out
    • Super fast drying so you have to dab this really fast as well
    • Ugly traces once it dried if you don't apply it evenly
    • Doesn't break out in wrinkles
    • Waterproof and smudgeproof. But not scrub proof. LOL.
    • Where did I get this: Zharas
    • How much: Approx. IDR 80K to 90K (USD 9)
    Score:
    4 out of 5

    Will I buy it again?
    I dunno, I haven't tried many other brands enough!

    That's all for now. See you :)


    Tuesday, April 22, 2014

    Tutorial: Ombre Lips

    I've heard about this Ombre Lips style these days here and there. Just what exactly an Ombre Lips anyway? Well, Ombré is French for a gradual colour change from light to dark or vice versa, almost like a dip-dye effect. Or, you may call it a gradient style.

    The creations themselves are vary. I would like to show you two of them. But before we begin, you have to follow these simple steps:


    1. Moisturize your lips.
    2. Whiten your lips. Here I use a BB cream (or you may use foundation or lip primer), but since it won't give you a white effect, I pat them again with an eye primer. Here I use a matte white NYX eye primer because the texture is creamy. Use a sponge instead of your fingers for smooth result.
    Then let's start!

    Rainbow Ombre Lips


    I wanted to submit this for the previous April 2014 IBB Makeup Challenge but I didn't have much time, so I just show this here. You have to provide a varios color of eyeshadow to begin with and just play with the palette!


    1. Base your lips.
    2. Apply shocking pink eyeshadow.
    3. Blend with a bright orange.
    4. Blend again a sunshine yellow.
    5. Last, put a little bright green there.
    6. Cover it with clear lipgloss and pout to blend the color!
    And, you're done!

    The complete look:


    Credits:
    NYX Eye Primer
    Coastal Scents 120 Eyeshadow Pallette
    Maybelline Clear Gloss

    ***

    Pink & White Ombre Lips


    This one's just as simple as the above style.


    1. Base your lips.
    2. Frame your lips with mauve or dark pink lipstick/lipliner.
    3. Fill the center part with white creamy shadow.
    4. Blend by pouting your lips. This is the hardest part, somehow the white color became more dominant.
    5. Apply clear lip gloss.
    6. Carefully, dab glitter dust on them and you're done! Too bad my camera can't capture the glitter, but trust me, it was very sparkly. LOL
    Tips: you can do the step 2 and 3 the other way around, whichever you think easier.


    Complete look:


    Since you can't see the sparkle effect, I just add my own with my camera app. :)

    Credits:
    WetnWild Lipstick (Mauve Outta Here)
    NYX Jumbo Pencil (Milk)
    Maybelline Clear Gloss
    Beautystyle glitter dust (pink)

    ***

    So those are ombre lips in my version. Yeah, I know they're not very wearable for everyday look, but you can adjust the color to your likings.
    Maybe I will create some more ombre lips tutorial in the future.

    Until then!


    Freaky Frog

    Okay, it's not something related to beauty but I just wanna post this. 

    Just the other day I saw a frog jumping inside the house, but I just ignored it. My kid was freaking out and he just tangled onto me so tightly that I couldn't move to shoo it away.
    When my husband got home, I told him about the creature, and he was freaking out, not because he was afraid... I mean, he took a wooden stick and searched the entire house, and when he couldn't find it he told me, if next time you see an unknown creature inside the house, just shoo it away, because you'll never know whether it's a real animal or something else.

    OMG, I was freaking out, what in the world did he meant with 'something else' anyway?! A voodoo sent?

    Gah! I hope it was a real frog!


    Sunday, April 20, 2014

    My April 2014 Haul

    There'll never be enough money
    yet time
    to feed your greeds

    For me, my favorite days to spend my pocket money is always on the third week of every month, because probably that's the week of nobody's payday. Restaurants, cashiers, supermarkets, traffic, shopping malls, are all (almost) empty. It's like having a shopping venue for your own, no bumping, no traffic jam, no queueing line. The only bad thing is that you often have to see the unfriendly faces of those cash register officers, or makeup booth assistants, because well... it's not payday yet! LOL!

    I never posted a haul before, so this is my first time. And these are the items I bought. Maybe if my husband wasn't pretty fussy about my shopping habit, I could have bought more. But trust me, these items are the things I need (I think), some of them are part my makeup routines, some are the things I haven't had any before.


    Kojie San Dream White Anti Aging Soap

    I grabbed this in a local drugstore because I was infatuated by one of an Indonesian beauty blogger who blogged about this soap (forgot who -_-). The word anti-aging always attract me. This is the small box. I'm using this, and after I spent the whole bar, I will try making a review.


    Kojie San Skin Lightening Soap

    I grabbed this because it's lined just beside the anti-aging soap. Curiousity, as usual.


    Revlon & Maybelline Clear Lipgloss

    Of all my lipgloss collection, I just realized that I don't have a clear one. I like Maybelline color better because it's so clear, but the formula often makes my lips dry, so I bought Revlon, just in case. I actually want to use these for my next lip art, just wait and see.


    Revlon Colorstay Lipliner in Red

    I always, always, wanted a flaming red eyeshadow like the ones Sugarpill and Lime Crime has, but those are too expensive for me. I tried many brands before but nothing could beat the shade, and using a red lipstick is just too messy, so why don't I just try using a lipliner instead?


    Revlon Photoready Perfecting Primer

    I don't have a face primer. I think I need one.


    Loreal makeup remover

    The best makeup remover I ever tried.


    Garnier BB Cream

    It's out of curiousity. It's cheap anyway, just a sample size.


    Revlon Nail Polish in Gold

    This is actually a gift for buying a certain amount of Revlon products in the counter. Since I only have three bottles of black nail polish, I picked this as the gift! Hahahaha.


    Silky Girl Pop Soda Lip Jelly

    Mindy Pauline used to blogged about this sweet thing but finding this is pretty hard, so once I see it in the drugsture, I just grabbed it right away.

    +++

    Yeah, that's all of my haul of this month.
    Actually there are some more buahahahah, but I forgot where to put them. 
    I think I'll find them. 
    Yeah, I have to find them now.
    Bye!


    Latest Post

    First Impression: Evershine Moringa Series