Okay, this is just a coincidence to talk about pink lipsticks in this pinkish themed month of February. Seriously. LOL.
Lately I've been craving about bold lipsticks. Oranges, pinks, reds, I tried them all. I just don't have the guts to wear black just yet tho'. Lime Crime, anyone? Hahahaha
Ok, enough chit chatting, I'm gonna share two bold pink lipsticks I wear lately. One is local Indonesian brand, and the other one is Korean.
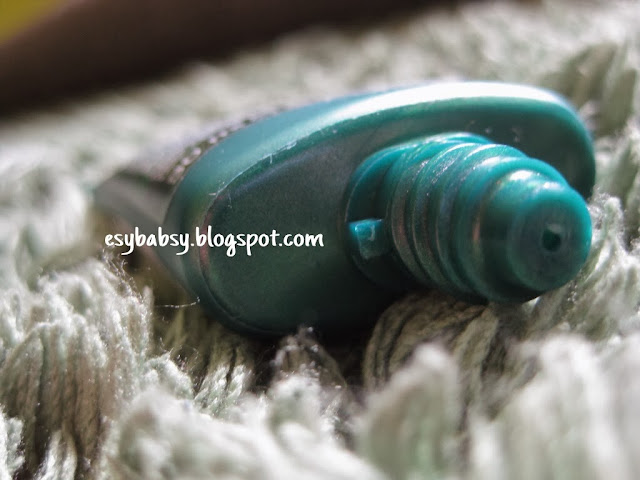
SARIAYU L01 (LASEM)

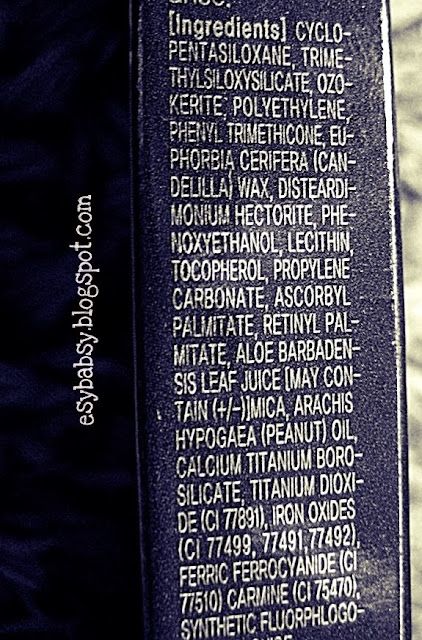
I already have this fuchsia lipstick for a while and love the color. This shade is actually a part of 2013 Makeup Trend by Sariayu cosmetic line. On the picture above, the tube is transparent. Well, it was actually wrapped in a beautiful batik plastic and there was a batik pattern engraved on the stick. But I knocked them off, on purpose.
This is what it'll look like when it's brand new:

The texture of this lipstick is very creamy and soft, giving your lips that soft and creamy look. The fragrant reminded me of the pleasant aroma of bubble gums I chewed when I was a kid. Brings back memories. Anyway, here's the result on my lips. Sorry i had to edit this since my camera kinda soften the color, but this one's the closest shade to reality. This is what you'd call fuchsia, the best pink shade for dark complexion.
Maybe because of the bold color, it stayed on my lips quite long but it did leave marks on my coffee cup.
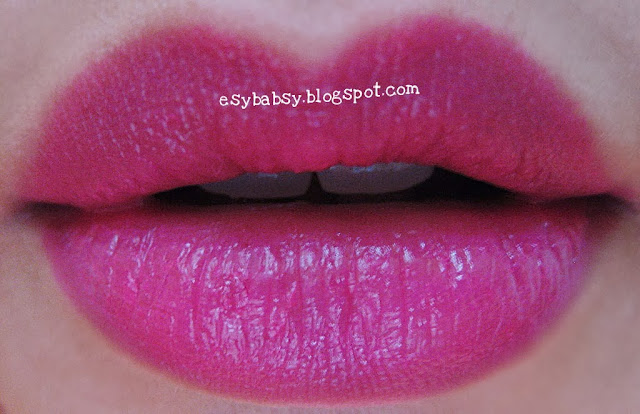

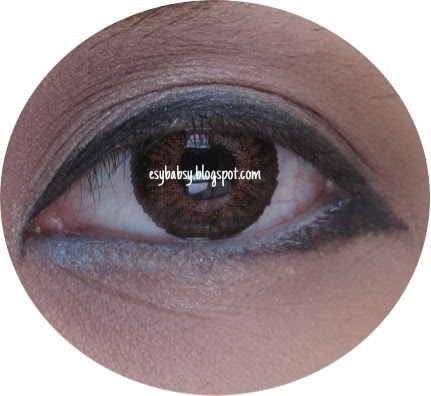
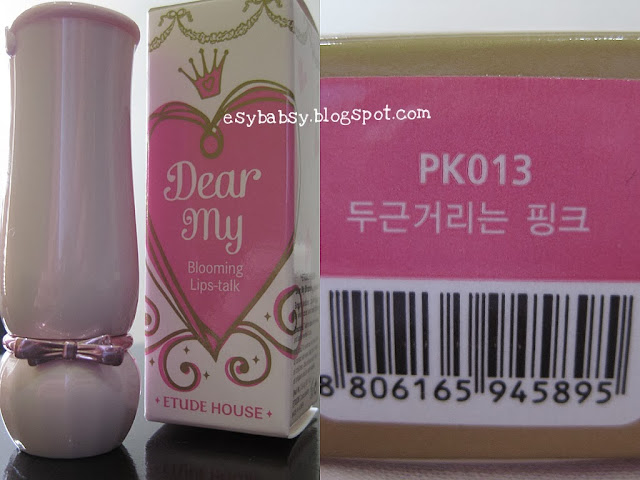
This is one of the most beautiful lipstick I've ever seen, the skin yet the flesh color, feel like biting it. PK 013 is a kinda barbie shade pink. Bold pink without making your face look like a middle aged woman. Will look great on fair complexion, tho' no one would forbid you to wear this if you have darker complexion. LOL. Too bad my camera, again, soften up the color, but the actual color is much more intense than the one in these photos.
One thing I kinda regret from these series is that they stain even after wiping them with makeup remover. I have a few shades from the blooming series, and they all stain. And this shade stains even more than the rest of them.
This is how it looks like on my lips. Again, I had to edit the saturation because of you know what. I think this is the closest one to reality.

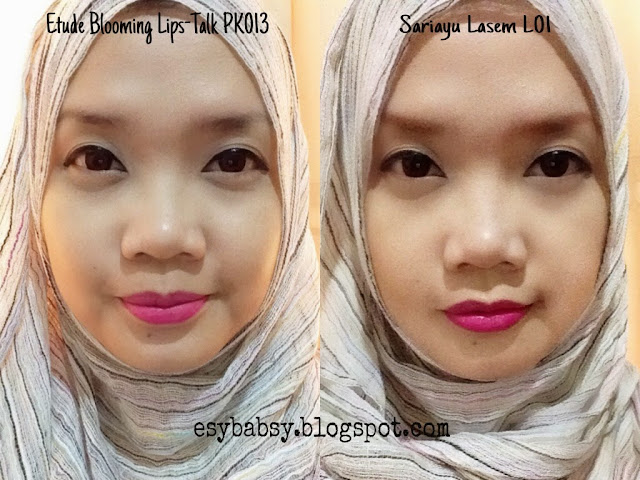
Compared to Sariayu lipstick with its creamy effect, this one has matte finishing.Totally. Both of them will stain your coffee cup but the difference is the texture. From the color I think I prefer this one, but considering the texture and the fragrant, Sariayu is way better than this.
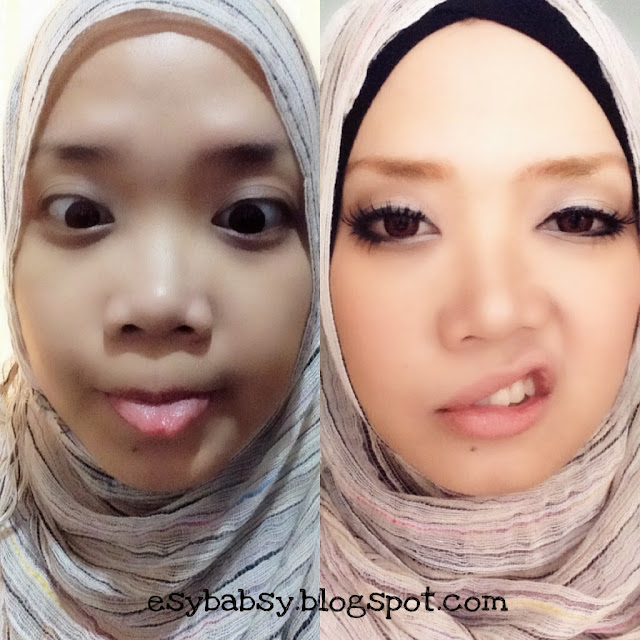
This is the writer's face with both lipsticks for your comparison. She's someone kinda awkward posing in front of the camera. So this boring photo is all what you get. Sorryyyy.. | ^_^ |
Conclusion?
Etude:
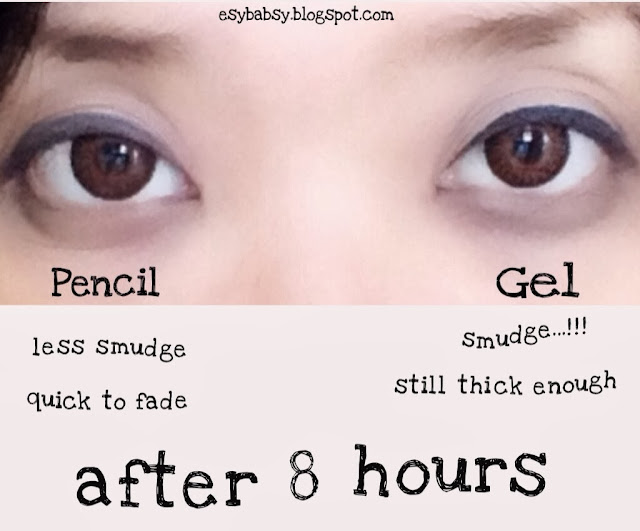
- Barbie pink shade
- Matte texture. I got my lips dry from not wearing chap stick.
- Good for fair complexion
- Long lasting
- Stains your lips, very badly
Sariayu:
- Fuchsia color
- Creamy and soft
- Good for darker complexion
- Long Lasting
- Stains your lips, but not too much
That's all for now. Comments or suggestions would be much appreciated !