Showing posts with label EOTD. Show all posts

Thursday, March 5, 2015

Tutorial: My Bloody Valentine's Guideline


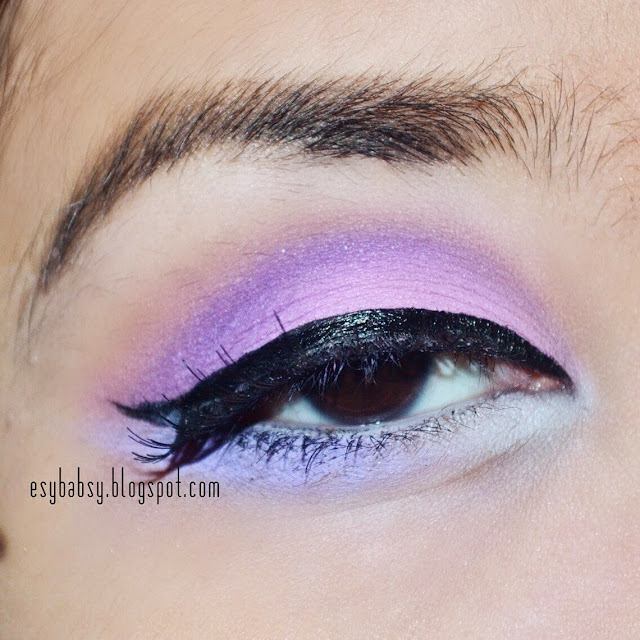
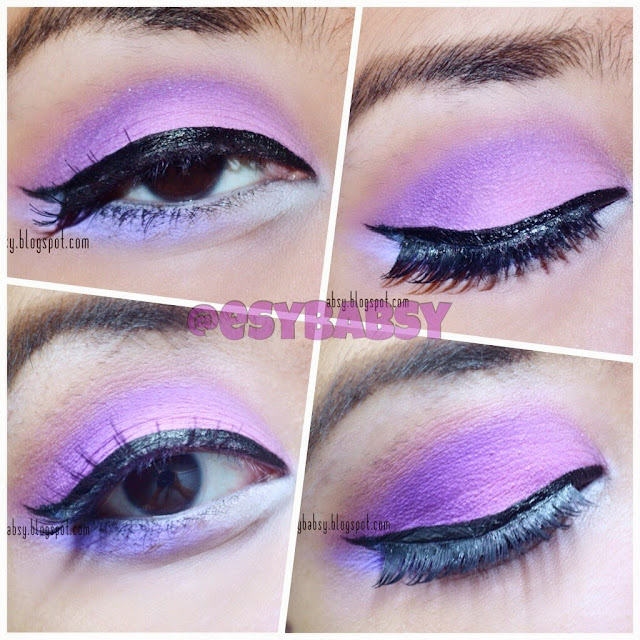
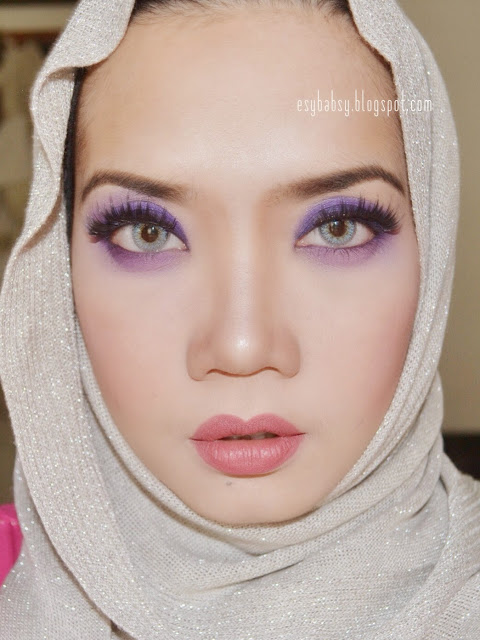
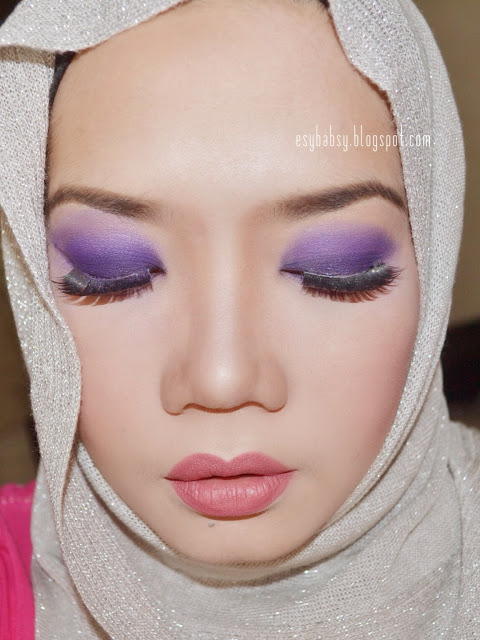
For those of you who read my blog, you might notice I did a collaboration on Valentine's Day with my fellow  beauty bloggers (click here). The picture above was the look I submitted. It's such an easy look, super easy and doesn't require a lot of products. If you wonder how to do it, let's read this post to the end. And btw, I posted this on my Instagram account, but it wasn't very detail.

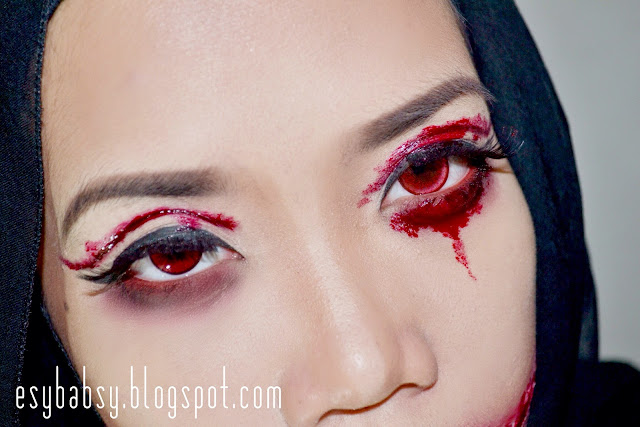
There are two parts I did for this look: the eyes and the slit/wounds on my cheeks. Let's do the eyes first.


THE EYES


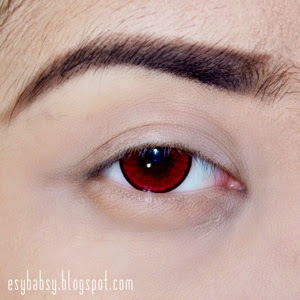
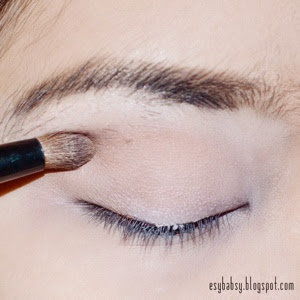
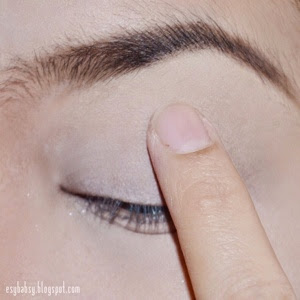
Draw your eyebrow. Applying eye primer is optional.


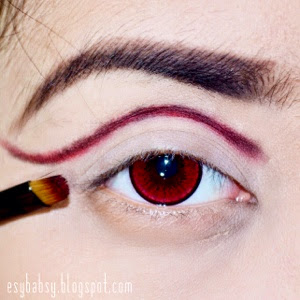
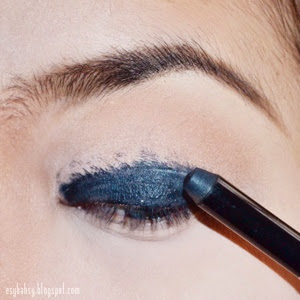
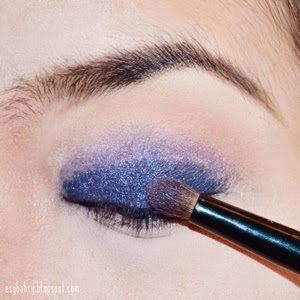
With an angled brush and red eyeshadow, draw a line along your crease like this. Top that red shadow with black eyeshadow.

*you can also use a red and black pencil. Whichever you think easier.


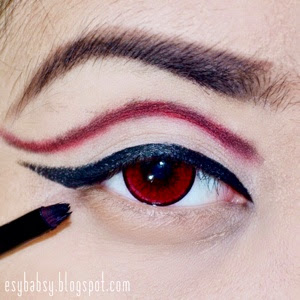
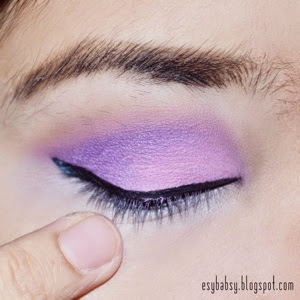
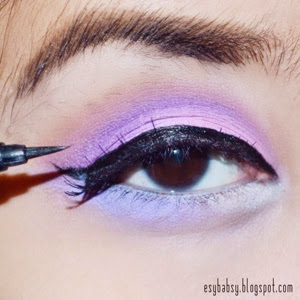
Frame your upper lid with eyeliner. Here I black gel liner and the brush from the product.


Glue your falsies.


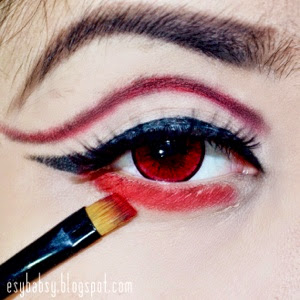
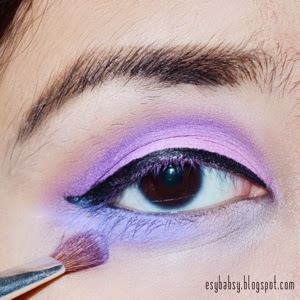
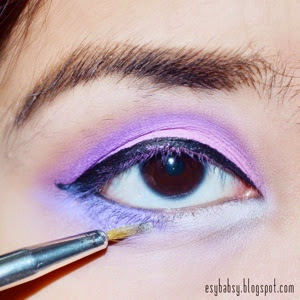
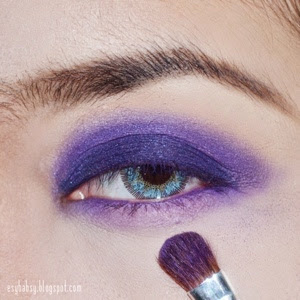
While waiting for ghe glue to get dried, using an angled brush, apply the previous red shadow on your lower lash bed.


With an eyeshadow brush, blend that red shit out.


Top the previous red shadow with a black eyeshadow.


Again, blend that black. Btw, do you notice that the glue have dried out already?


Retouch your eyeliner again, just to cover all those imperfections caused by the falsies glue.


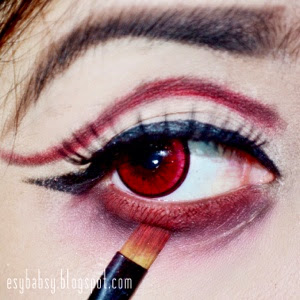
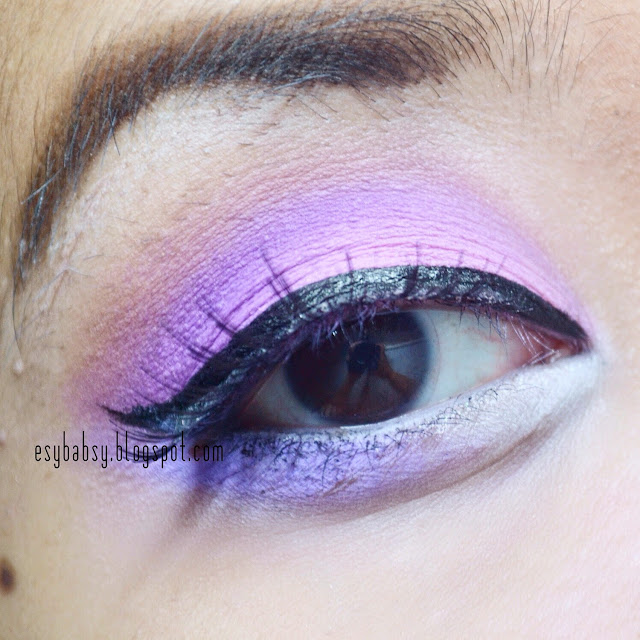
Apply red eyeshadow using anangled brush on your waterline.
Actually, most people use red pencil, but my eyes are extremely watery. So I need something 'stronger' than a regular pencil.


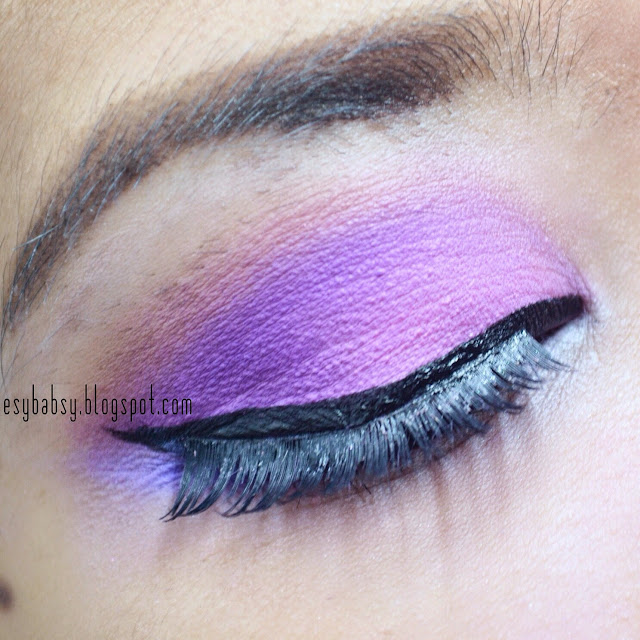
Apply mascara. I don't curl my lashes since they are so tiny and almost invisible. But if yours are long and thick, I suggest you to curl them.


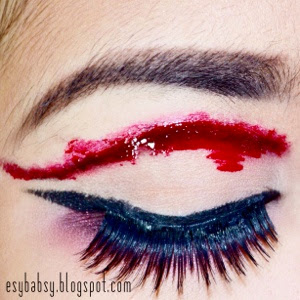
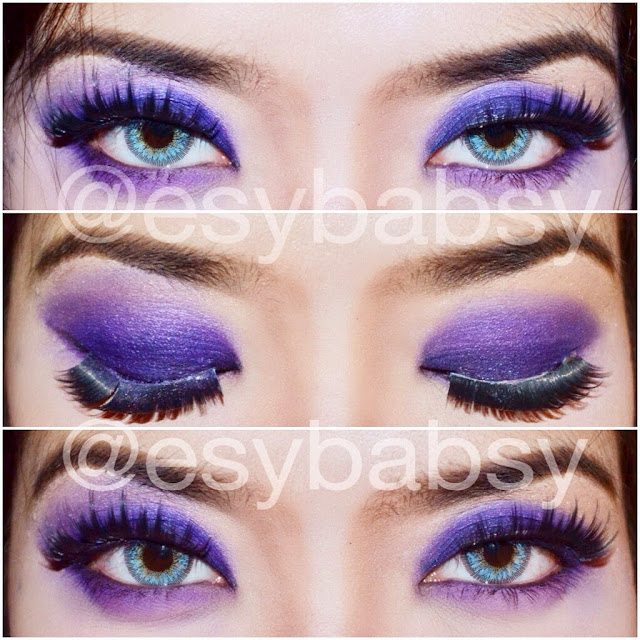
Apply some blood gel or food coloring using a cotton swab on previous crease line to make the effect of a 'bloody cut crease'. Literally. Try to apply it randomly. Not too perfect and not too much.
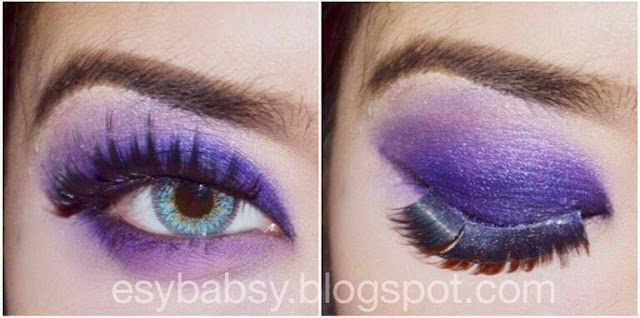

Final result:


***


THE MOUTH SLIT


What you'll need:
  • A peel-off mask (I use Garnier mask).
  • A Scissor or razor
  • A sponge.
  • A lip brush.
  • Red and black face painting, or you can use red/black eyeshadow/lipstick/pencil.
  • Blood gel or red food coloring.
  • Some pins or needles (optional)


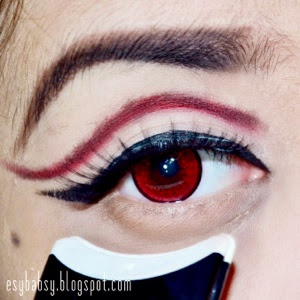
Apply your peel-off mask on your cheek. Right beside your lips, pointing to your ears. Try to imagine the shape a ripped-mouth. Do not apply it too thick or it will take forever to dry out. Wait until it gets dry, then apply your foundation and set it with translucent powder.


Using a scissor or pinset, cut the mask into the shape of a ripped mouth. Just use your imagination.


Mix the red and black face paint until it become a dark red shade. Apply it on the middle of the wound. Try to make the end as pointy as possible.


Dab the red paint on each side of the wound. Try to leave some 'white line' along side of the wound to make it more realistic. Do not spread the red paint to much. We want to focus on the ripped-mouth only. If you do, simply erase the paint with make up remover and reapply the foundation.


Apply blood gel or food coloring on the wound. You can use a cotton swab.


If necessary, add some pins or needles. Buuut please don't stick it right through your flesh, will ya.


Deetz:


Face
  • Maybelline Dream Liquid Mousse Foundation (Light) mixed with La Tulipe Cover Foundation (Natural)
  • Kryolan TV Paint Stick (NG1) for contouring
  • NYX Single Eyeshadow (Dark Brown) for contouring
  • Oriflame studio Finish Translucent Powder
  • Maybelline BB Silk Powder (Natural)
Eyes
  • SilkyGirl Eyebrow Pencil (Dark Brown)
  • Wet n Wild Eyebrow Kit (Ash Brown)
  • Sugarpill Pressed Eyeshadow (Love+)
  • Sleek Acid Palette (Black)
  • SilkyGirl Gel Eyeliner (Black)
  • Yukkiyuna Falsies (Victory)
  • Max Factor Clump Defy Mascara (Black)
  • Princess Universe Softlens (Mars)
  • Red Food Coloring fro the blood
Lips
  • Max Factor Max effect Gloss Cube (Wild Cherry)
Wounds
  • Garnier Peel-Off Mask
  • Red Food Coloring


This look is easier if you made this using liquid latex or spirit gum, but since I'm a cheapskate, I replace this with a peel-off mask. Of course nothing can beat the elasticity of those magical stuff and I will strongly suggest to use them for professional purposes. This is just for fun. And by the way, it is not my original idea, my fellows Annisa Lesmana and Aldila have done this before.


Hope this inspires enough. See you!


Thursday, January 22, 2015

Tutorial: Sweet Pink & Purple Eye Make Up


Nah, jadi kan ceritanya kan bulan depan kan ada hari Valentine nih kaaan. Walaupun gue haram ngerayain gituan, tapi gapapa dong kalo gue bikin EOTD yang bertema Valentine. Mungkin elo udah bosen dengan segala sesuatu yang berbau pink dan ungu di hari Valentine, tapiii ah bodo amat. Gue kali ini mau mengusung warna klasik khas Valentine, yaitu pink.
 
Tapi pertama-tama gue mo bilang, maybe tutorial kali ini gak semaksimal biasanya karena gue masih gak enak badan (alesan!). Tadi aja abis kerokan. Tapi gue kangen sama alat make-up gue, jadi bela-belain deh bikin ginian. Heheheh. Yuk langsung aja.
 
 
First of all, here are the eyeshadow color you'll need:
  • Light purple
  • Dark purple
  • Baby pink
  • Skintone
  • White
*And make sure they're all matte.


After drawing your eyebrows, apply eyeshadow base on all over your upper lid.


Using a fluffy blending brush, apply a skintone eyeshadow on your crease and outter V. Blend it outside and inside.


Using an eyeshadow brush, apply a baby pink color on all over your upper lid.


Using the same brush, apply a dark purple on your outter V and crease, just below the skintone color. Blend it with the pink.
 
*if you overdid with the purple, you can retouch the pink color again. I kept on going back and forth retouching the pink and the purple over and over again until I get just the right result.


Using whatever tools you prefer, frame your upper lid with black eyeliner. Don't have to be so neat or perfect, this is just to mark where your false eyelashes will be glued later on.


Apply eyeshadow base on your lower lid.


Apply purple eyeshadow on half part of your lower lid.
 
*you can use the same purple with the previous one, but since I want to make this look cute, I use a lighter purple. And if you want to make this look even cuter, try to apply a pink shadow instead of purple.


Fill the rest of your lower lid with white eyeshadow. Here I apply it with eyeliner brush.


Glue your false eyelashes. Don't worry if your eyeliner doesn't look so neat, we'll retouch it later on.


While waiting for the glue to be dry, line your waterline with white pencil.


Now that the falsies glue is dry, retouch your black eyeliner. Also try to cover all those naughty white glue that doesn't seem to change color after it's dried. The point is, blacken everything.
 
This is also the right time to change your wing liner shape. The longer, the naughtier. But since I want to keep this look so simple and cute, I just make a tiny wing eyeliner.


The last one is to curl your lashes and apply mascara.
Btw, I want to confess that I barely curl my lashes since they're almost invisible. So few and soooo short. But for those who have long lashes, you have to curl it.
 
And we are done!
 
For the best result, match this eye make up with pink blusher and pink lipstick.
 
 
***
 
 
Picture spamming!
 
 
Ini pake flash.
 
 
Ini juga fotonya pake flash.


Yang ini fotonya dongak sambil ngadep ke lampu neon, kaga pake flash. Tuuuh kan keliatan ada tangan gue lagi ngeker.

Btw, kenapa ya menurut gue hasil fotonya lebih bagus kalo pake camera flash ketimbang lampu biasa.... Ada yang tau kenapa gak?


Oke, ini adalah barang-barang yang gue siksa selama pembuatan:
  • NYX Eyebrow Gel (Brunette)
  • Wet n Wild Eyebrow Kit (Ash Brown)
  • NYX Eyeshadow Base (White)
  • Nonna Eyeshadow Palette No. 3 (White & Skintone)
  • BH Cosmetics Eyes On The '80s Palette (Dark Purple)
  • Lime Crime D'antoinette Palette (Baby Pink & Light Purple)
  • Koji Dolly Wink Liquid Liner (Black)
  • Max Factor Clump Defy Mascara (Black)
  • Unbranded falsies
  • Acuvue clear softlenses


Oke sebenernya EOTD ini adalah hasil recreate dari EOTD gue yang dulu. Tapi ga tau kenapa yah, kok hasilnya beda. Di look yang sebelumnya lebih ngepink, tuh tuh tuh kayak di foto atas. Tapi yang sekarang lebih biru-biru ungu gimana gitu, padahal warna yang dipake gak jauh beda. Hmmm, maybe kalo elo recreate makeup gue yang ini, hasilnya bakalan beda juga nih, kayaknyaaaa.
 
 
***
 
 
Baiklah, sampai ketemu lagi!
Muuuaaah.


Tuesday, January 13, 2015

Tutorial: Bold Purple Smokey Eyes

Okay, so this time I will show you how I did this:


This is actually my part of previous collaboration with my friends. It's just too many pictures to be posted in one article, also I want to make this tutorial as detail as possible.


Aside from eyebrow tools, you're gonna need:
  • Dark purple, light purple, white, and skintone eyeshadow colors
  • Black gel/creamy color
  • Mascara
  • Black pencil
  • Eyeshadow base
  • Softlens and falsies (optional)


Just for your reference, here are the shadows I used for this look.


You can either use this or find similar ones on your own collections. The products breakdown will be mentioned at the end of this post.

Okay, let's start!


Draw your eyebrows first, then apply eye primer on all over your lids to avoid creasing.


Using a small fluffy blending brush, apply a skintone color on your brow bone to give it more dimension. Blend it upward.


Apply a creamy black color on your upper eyelid, but don't go above your crease. You can also use a black gel liner. Here I just used a creamy black pencil by Make Over. This will be our second eye primer.


Blend that black shit with a fluffy blending brush, up to your crease.


With a fluffy blending brush, apply a light purple color on your brown bone.


With an eyeshadow brush, apply a dark purple covering the previous black color. Blend it with the light purple.


Using an angled brush, apply the same dark purple on your lower lash line. Connect it with the color on your upper lids.


Blend that purple with an eyeshadow brush.


Highlight your brown bone with white eyeshadow.


Color your waterline with black pencil.


Apply falsies.


And don't forget your mascara.

And there it is, you are done!


Final look:


Products abused:
  • BH Cosmetics '80s Palette (dark purle, light purple)
  • Nonna Eyeshadow Palette No. 3 (white, skintone)
  • NYX Eyeshadow Base
  • Duo Eyelashes Glue (White)
  • Viva Automatic Pencil (Black)
  • Max Factor Clump Defy Mascara (Black)
  • NYX Eyebrow Gel (Brunette)
  • Wet n Wild Eyebrow Kit (Ash Brown)
  • Eye Candy Bulle Softlens (Blue Gray)
  • Unbranded falsies
 
If you don't have the shadows from the brands I own here, you can use any similar color that you have. Also you can change the color according to your taste.


For complete look of this eye make up, click here


Latest Post

First Impression: Evershine Moringa Series